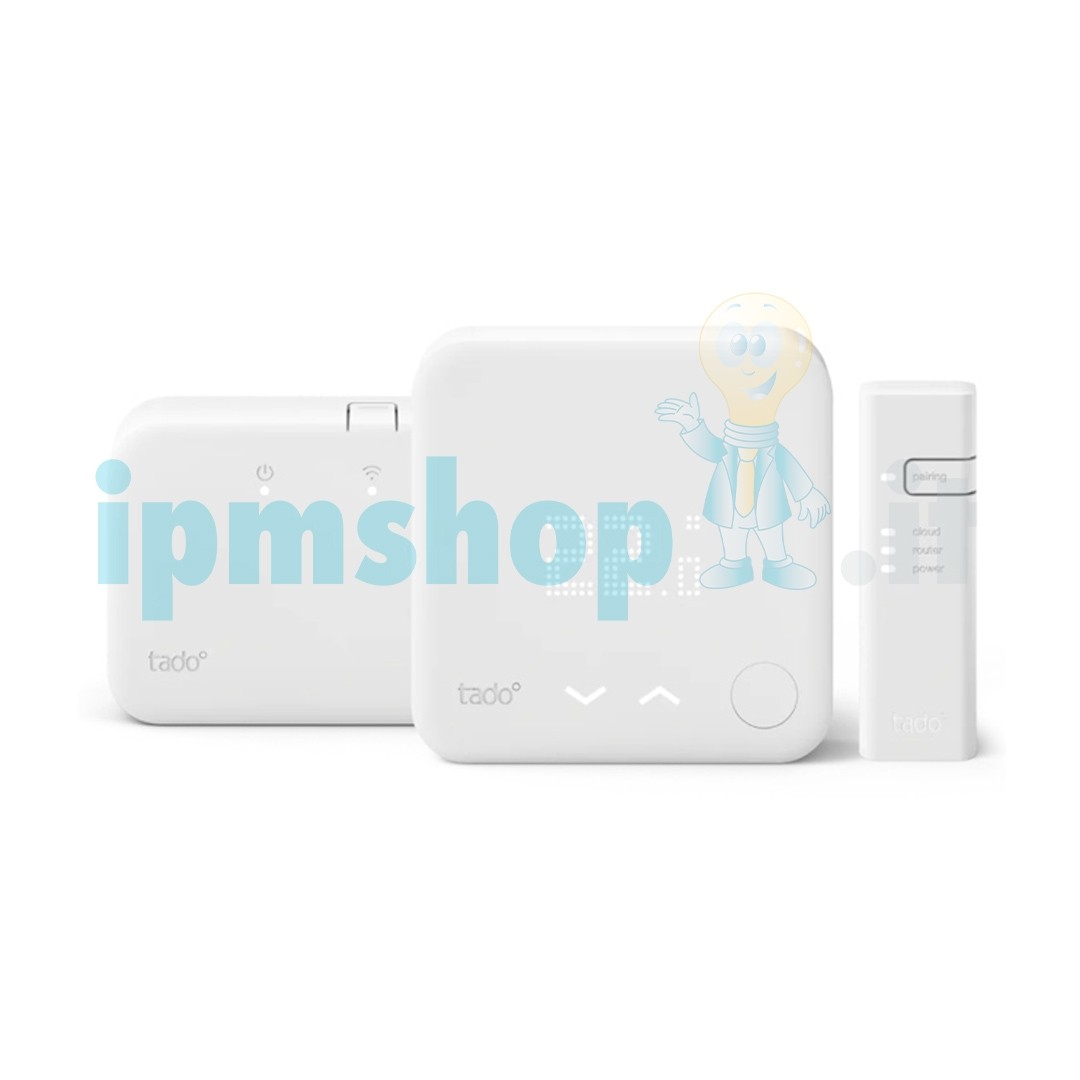


Tado° - Base Kit V3+ is a wireless smart thermostat compatible with 95% of autonomous and centralized heating systems (check the compatibility from the table in the attached documents). You just need to replace the existing thermostats that manage the boiler or individual rooms. Individual radiators can be controlled by the thermostat through the addition of smart thermostatic valves and smart thermostats that will extend your Tado° smart home system. You can install the Tado° thermostat even if you live in a rental property: simply reinstall the old devices when you move out and take your smart heating system with you. This starter kit includes: 1 Tado° smart thermostat, a radio receiver for boiler management, and an Internet Bridge that allows Tado° devices to connect to the network and provide smart app features.
Tado° - Base Kit V3+ lets you manage the heating at any time, wherever you are, through the app. Additionally, with the "Auto-Assist" function for home automation, you can fully automate your home’s climate based on your habits to ensure maximum energy savings.
If you need other products or accessories for climate control, click here.
Tado° - Base Kit V3+ detects window openings, takes weather forecasts into account, and helps adjust the temperature depending on your distance from home. Set up your Tado° smart home system using smart thermostats and smart thermostatic valves, to individually manage heating in each room. Tado° reminds you to turn off the heating or air conditioning when the last person leaves the house and turn it back on just in time for the first person to arrive. It adjusts heating or cooling based on weather forecasts to save energy. If you move or rent the house, you can perform a reset or share devices.
If you have questions or concerns about how Tado° products work
Click the button below
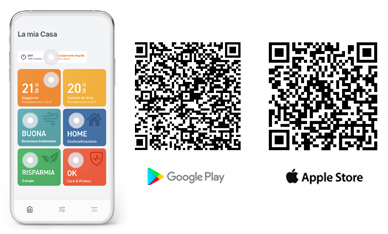
Control Tado° remotely using the Tado° app on your smartphone. Set personalized schedules and receive reports and tips on how to heat more efficiently to save energy. View in the app all the rooms controlled by Tado°. "Care and Protect" constantly monitors your heating system, notifies you of abnormal behaviors, and helps you resolve any malfunctions on your own.
If your guests or residents don't have access to the Tado° app, you can make sure they feel comfortable even when you're away from home.
Based on the habits of your guests or residents (such as babysitters or children) you can change the programming of each room. To do this, you will need to deactivate Geolocation for the relevant time slots. In this way, regardless of whether the members of your Tado° app Home are at home during these time slots, Tado° will follow the heating schedule for the selected time slot.
You can always control your heating manually, either by using it in manual mode in each room, or by changing the control mode throughout the house. To change the control mode, from the main Home screen go to "Geolocation" and manually change the "Home" mode to "Away". Tado° will maintain the chosen mode until a Home member changes it again. This change will be valid, not just for a single room, but for your entire Tado° system. Users who do not have a smartphone can still control Tado° directly thermostats.
Sign in to the Tado° app using your account to get instructions on installing and configuring the following devices: Smart thermostatic head, Smart thermostat , Wireless temperature sensor, Radio receiver or extension kit .
You will then be guided through the installation process:
To continue with installations reported as incomplete, go to the Tado° app and in "Settings" select: "Rooms & devices" by clicking again on "Installation instructions".
For devices already present in your Tado° app Home:
If you have smart thermostatic heads, however, that's enough restart them. You can then mount them on the radiators in your new home.
To invite a user to manage your devices, follow the steps in the Tado° app:
To remove one or more users and their devices from your Tado° Home, read the following instructions:
You will only be able to see this option if there is more than one user in your Tado° Home.
With the Tado° app, manually adjusting the temperature is quick and easy. When you make these types of changes, Tado° switches to "Manual Control" ignoring "Smart Scheduling" for the selected period.
Here's how you can manually control the temperature in the Tado° app:
Here's how to change the manual control duration:
Here's how to change the manual control duration for climate control:
You can choose from the following options:
You can customize the way Tado° manages your heating using 'Smart Planning' (whether anyone is home or no-one). Tado° can activate "Home" or "Away" modes. When in "Home" mode, Tado° applies the settings from the Home section of "Smart Schedule". However, when in "Away" mode, Tado° applies the settings selected in the "Away" section. In the event that, for a certain time slot of "Smart Planning", "Geolocation" has been disabled, Tado° will apply the settings chosen for that specific time slot, regardless of the mode in which "Home" or "Away" is set. ".
Your Tado° account has a standard "Smart Schedule" already activated. To modify and customize it, access the app screen relating to the room you are interested in and click on the "Smart planning" icon in the upper right corner of the screen. Each room's "Smart Schedule" has two sections: "Home" and "Away."
On the Home screen, it is possible to divide the daily period into several time intervals and define, for each of them, the desired settings, such as the temperature, in order to satisfy the needs of your routine. Tado° follows the settings defined in the Home section of "Smart Schedule", only when in Home mode.
To define Tado° 's schedule when in Home mode:
There are three options:
Note: You can outline different settings for each of the three options and switch between them as needed. You can choose, for example, Mon-Fri, Sat, Sun for the cold months (when greater heating activity is required). For the summer months, however, you can choose Mon-Sun, when heating is not necessary.
Each day is indicated as a 24-hour period starting at 00:00 and ending at 24:00. The start and end times of the daily slot cannot be changed. The programming for a given day must have at least one time slot. If other time slots are added they must last at least 15 minutes. To add a time slot, click "Add Time Slot", located below each line of time slots. When you add a time slot, you can choose the start and end time. If the time range of the new time slot overlaps with the existing time slots, the app will automatically adjust, or delete the existing time slots accordingly. It is also possible to modify or delete time slots from the programming.
To heat rooms, you can copy and paste "Smart Schedule" settings between rooms by simply doing the following:
These actions will replace all existing schedules in the selected rooms with the current room's schedule. Please note that copying and pasting schedules will affect the following:
The copied schedules remain independent of each other. Making changes later to one will not affect the other. It is not possible to copy and paste schedules between rooms with "Smart climate control".
You can copy and paste your "Smart Schedule" settings between days by simply doing the following:
These actions will replace the existing schedule from the day you pasted with the schedule from the day you copied from. You can copy a day's schedule and paste it into another schedule type (Mon-Sun/Mon-Fri, Sat, Sun, etc.).
You can also copy the schedule for a given day in one room and paste it to another day in another room. You can, however, copy heating schedules only from another room with a heating schedule. The same applies to the cooling and hot water schedules. The "Paste" action is not reversible. Furthermore, the copied programming remains independent of each other. Subsequent modification of one does not affect the others.
"Geolocalization" is active by default for each time slot. To disable it, click on the time slot and access the "Advanced settings" section.
Tado° follows the settings defined in the "Away" section of "Smart Planning", only when in Away mode. For rooms dedicated to heating, you can set a minimum value for the Away temperature, the lowest value the internal temperature can reach when tado° is in Away mode.
If "Auto-Assist" is enabled, you can also find this setting in this section: "Preheat before returning". Tado° will automatically determine the ideal Away temperature for you when in Away mode.
You can choose between three available preheat levels: "Eco", "Balanced" or "Comfort". Tado° also identifies the most appropriate time to start heating your home, so as to reach the temperature set in "Smart planning" in time for your return.
If a Home user has manually set Tado° to "Away" or "Home" mode, "Automatic geolocation" and the "Preheat before returning" function will be deactivated. To re-enable "Automatic geolocation" and the "Preheat before returning" function, Tado° must be set to automatic mode again. If the "Preheat before returning" function is set to "OFF", Tado° maintains the minimum "Away" temperature when in Away mode.
To change a time slot, click on the slot to access the settings. By changing the time slot, you can choose the start and end time. If the time range of the new time slot overlaps with the existing time slots, the app will automatically adjust accordingly or delete the existing time slots.
If you keep the heating off, Tado° will automatically set your system to anti-freeze function (5 °C). If you keep it on, you can set the preferred temperature for each time slot.
You can do this directly from the "Smart Programming" screen. Simply click, tap and drag the time slot to the right or left. Note: the start time of the first time slot and the end of the last are fixed and cannot be changed.
You can do this by going to the "Advanced Settings" screen. Geolocation is active by default for each time slot.
You can also do this from the "Smart Programming" screen. Click and hold on the time slot, then drag it to the right until the trash can icon appears and release.
Thanks to the "Antifreeze" function, Tado° ensures that the heating system does not suffer damage if the temperature drops below zero. In fact, very low temperatures risk causing the pipes to freeze or even break, thus causing damage to the heating system. To avoid these problems, Tado° ensures that the internal temperature never drops below 5°C, even when the heating is turned off.
This section explains in detail all the reset procedures for home automation devices Tado°. Click on each item in the index to find the answers you're looking for.
Index:
To restart the Internet Bridge, press and hold the pairing button for about 10 seconds, until the LEDs turn off. The Internet Bridge will automatically restart once the button is released.
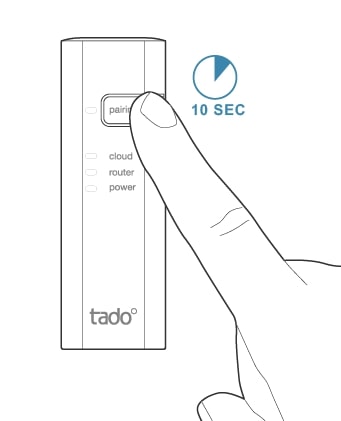
If you have the previous version of the Bridge, which lacks the pairing button, you can restart it simply by unplugging the power cable for 30 seconds. When you reconnect the power, the Bridge will automatically restart.
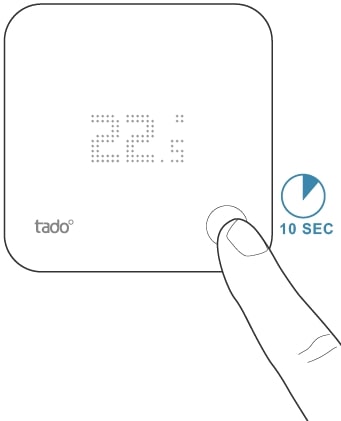
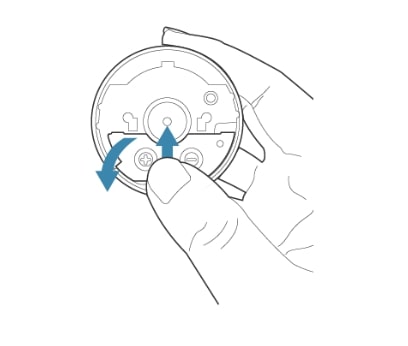
To restart the smart thermostat or the wireless temperature sensor, press and hold the button located at the bottom right of the device for about 10 seconds, until the screen turns off. The smart thermostat will automatically restart once the button is released.
To restart the smart thermostatic head, remove the batteries from the device and wait 10 seconds before reinserting them; then close the battery compartment and wait 1 minute before remounting the device. This ensures proper calibration. The device will automatically restart.
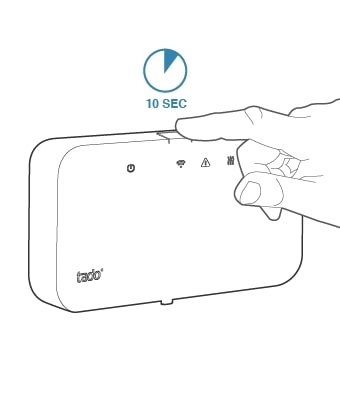
To restart the radio receiver, press and hold the main button located on the top of the device for about 10 seconds, until the LEDs on the front turn off. Then release the button and the device will automatically restart.
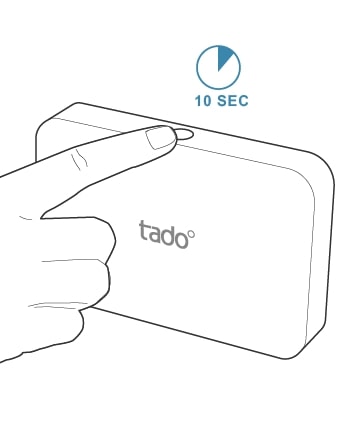
To restart the expansion kit, press and hold the button located on the top of the device for about 10 seconds, until the LED on the front turns off. Then release the button and the device will automatically restart.
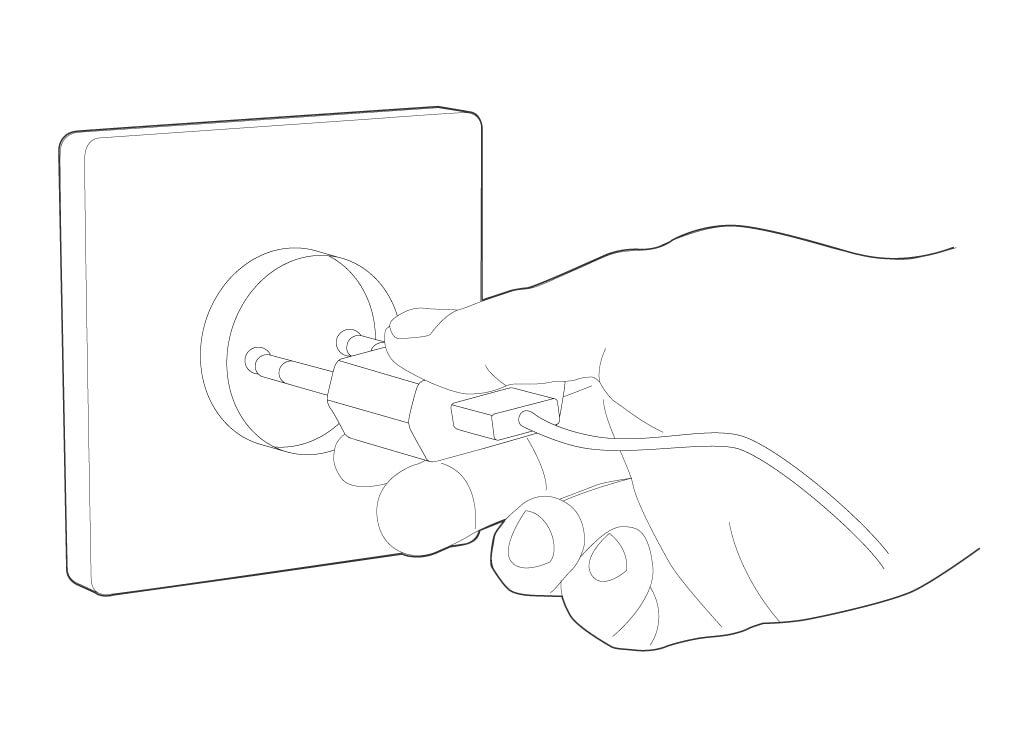
To reset the smart climate control, disconnect the power supply from the socket for about 10 seconds. The device will automatically power up once the power is restored.
Control Tado° remotely using the Tado° app on your smartphone. Set personalized schedules and receive reports and tips on how to heat more efficiently to save energy. View all rooms controlled by Tado° in the app. "Care and Protect" constantly monitors your heating system, notifies you of unusual behaviors, and helps you resolve any malfunctions independently.
